 Niraj Poudel
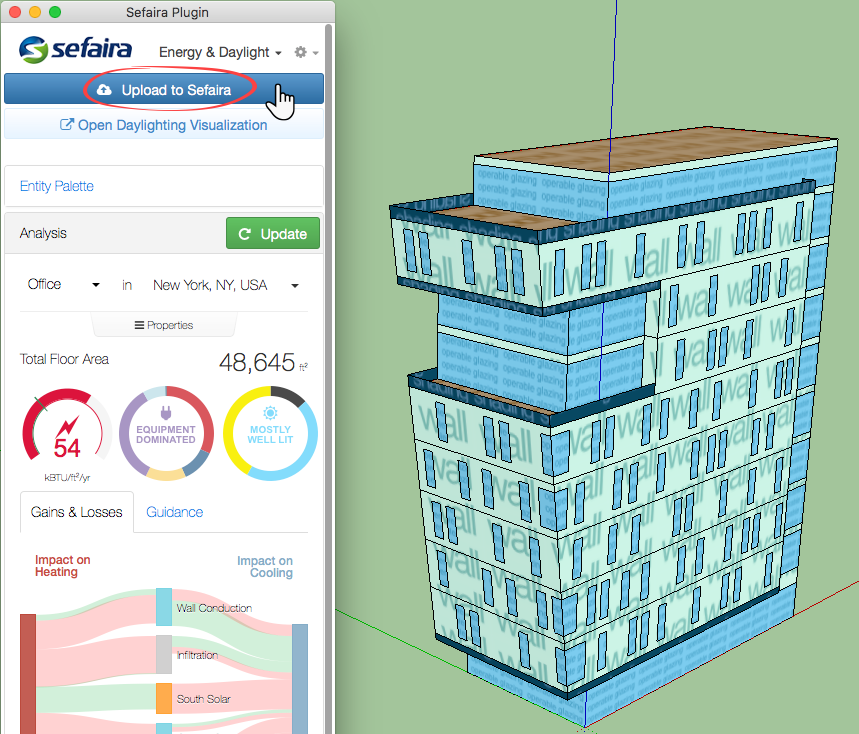
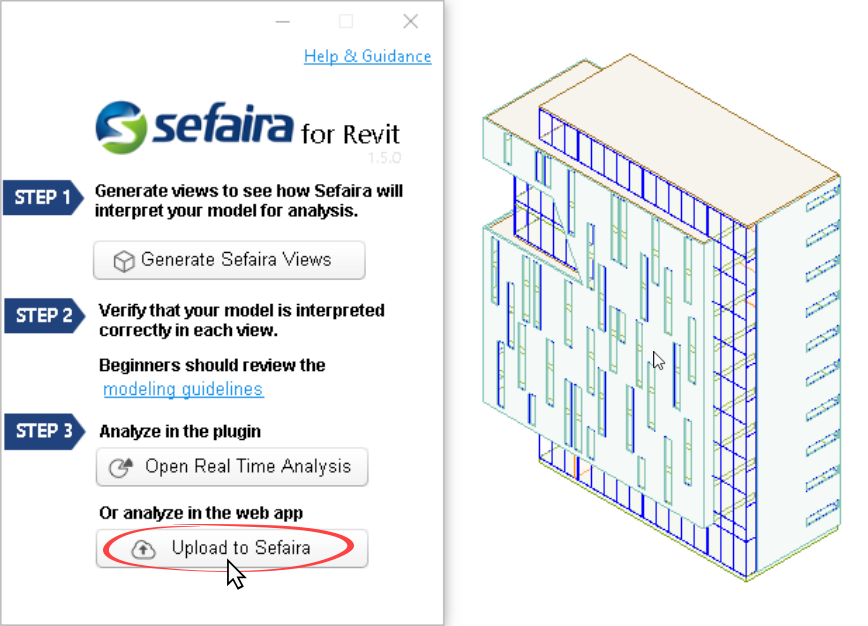
To upload a model to the Web Application, simply use the 'Upload to Sefaira' button from either the SketchUp or Revit plugin. A link will be provided to the Web Application where you can either create a new project** or add the model to an existing project. New models can only be uploaded directly from the plugins. Once a model is uploaded to the Web Application, it is stored in your user massing library (discussed further below).
Using an Existing Model from the Massing Library
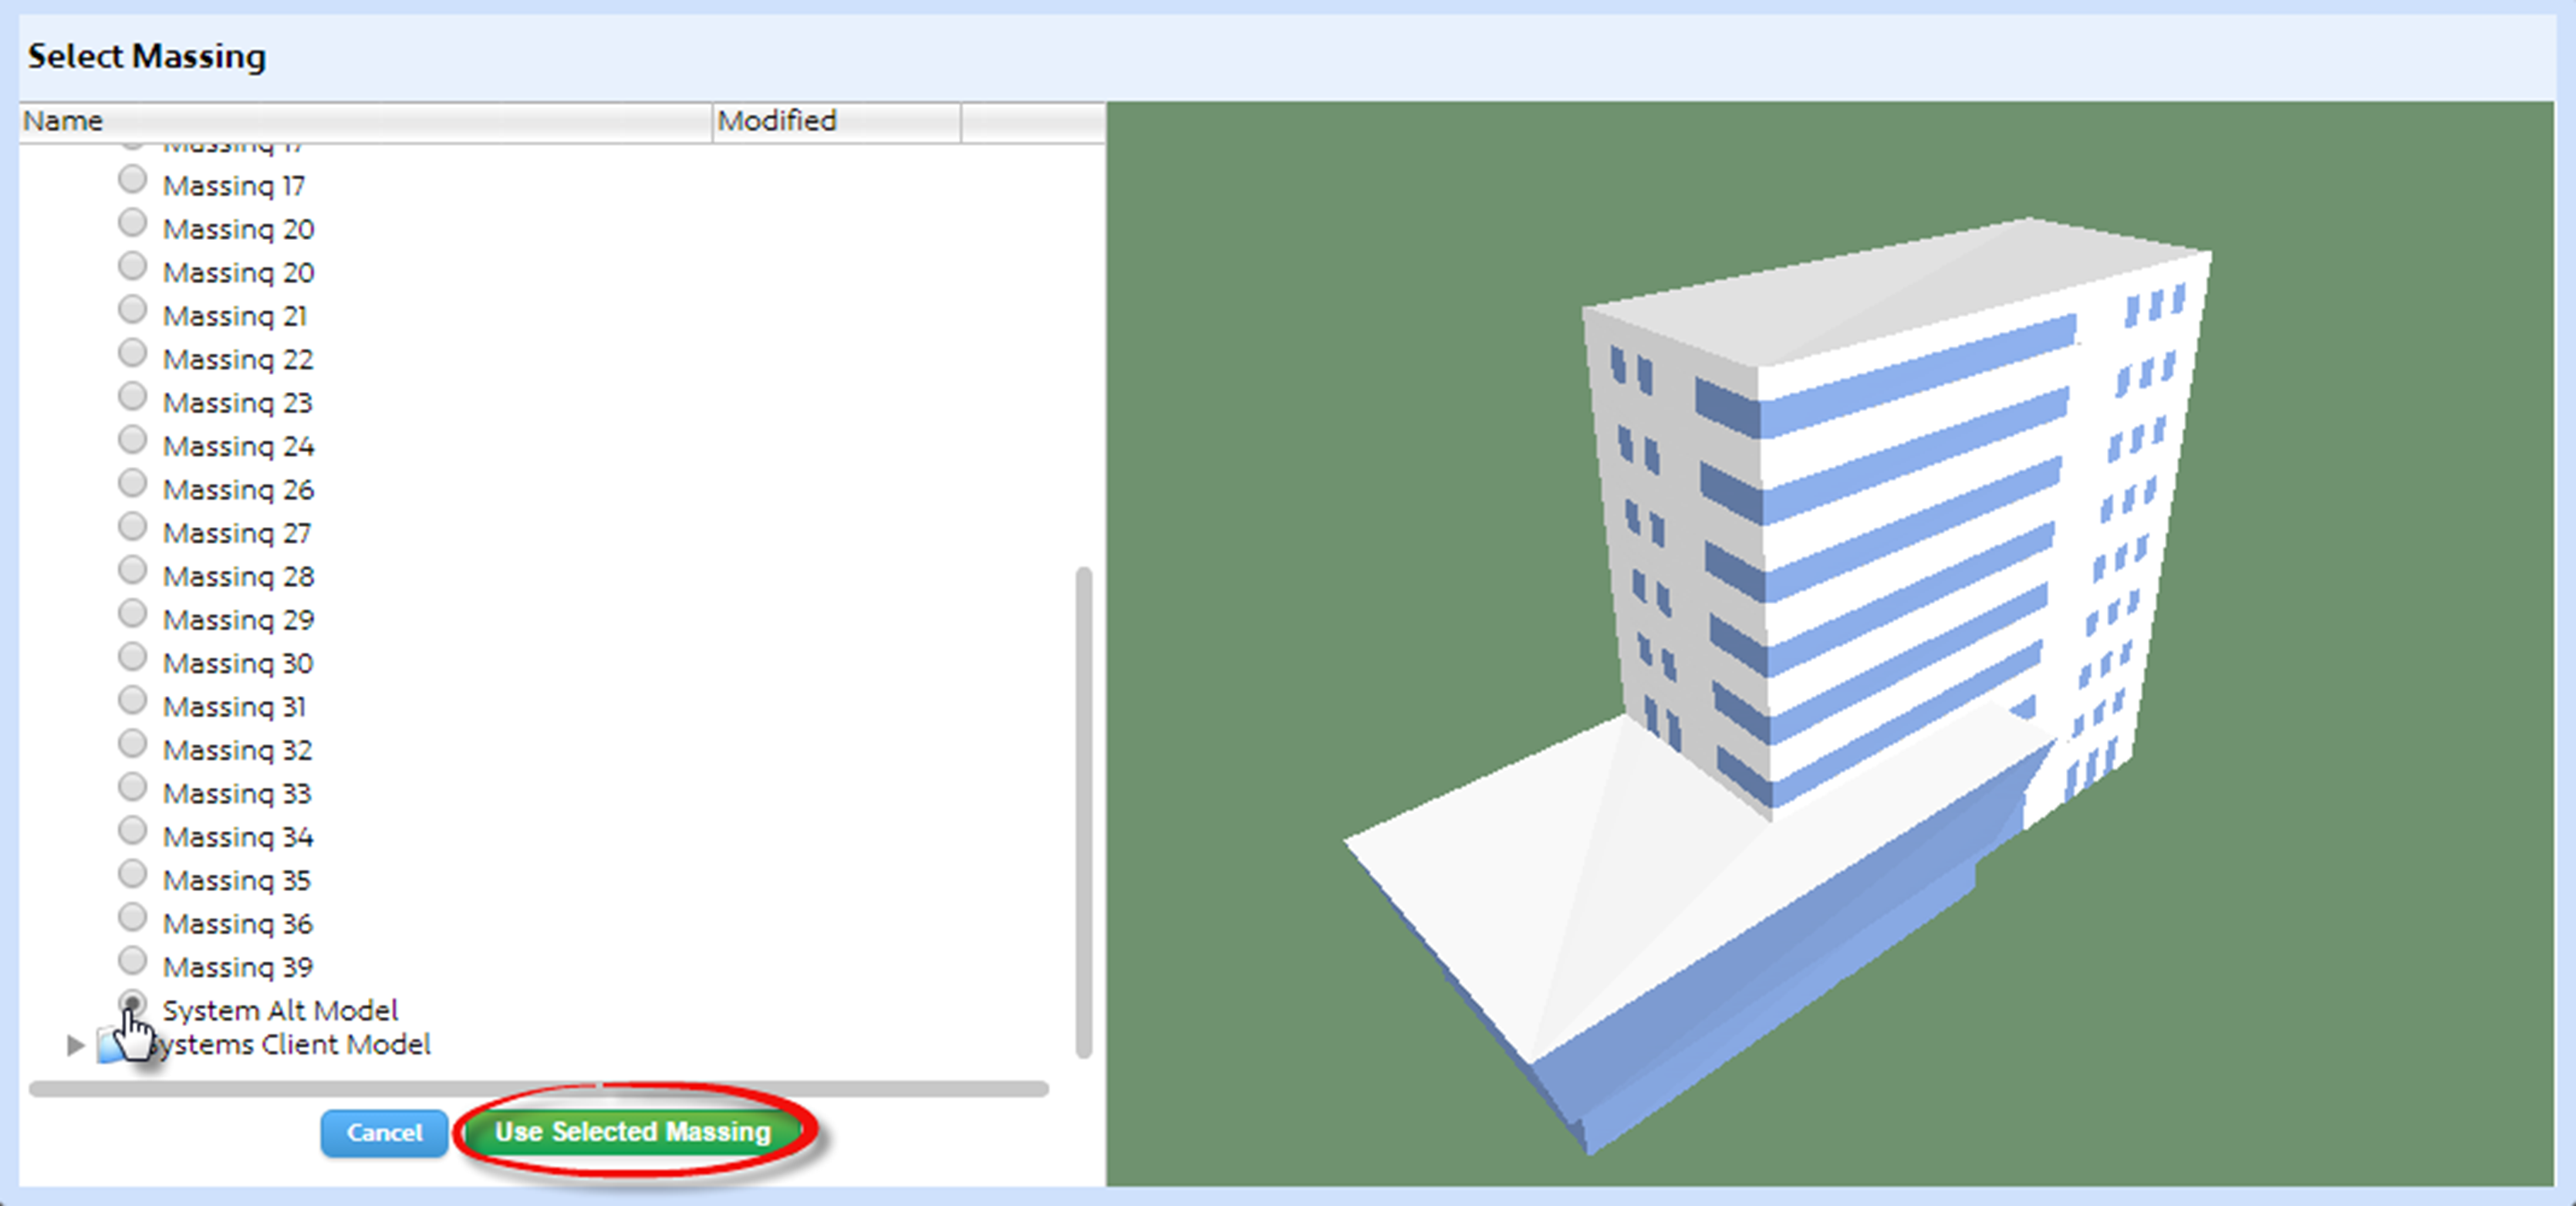
Any massing can be replaced. This is handy if the model has been updated or changed and you would like to run the analysis with the new massing without tinkering around with the all the inputs. Upload the new model to the existing project. Then, hover over the image of the massing you would like to replace and click 'Change'. Then, select the new massing you had just added from the Massing Library.

The Massing Library will appear as the below image:
**Please note that projects created in Internet Explorer 9 or 10 may cause issues - see more here.
If you have any comments or questions, please check out the SketchUp + Sefaira Forum or contact support@sefaira.com
Comments