 Niraj Poudel
1. Turn off Model Categories in Revit
This will reduce the file size tremendously, making it much easier to transfer and work within SketchUp.
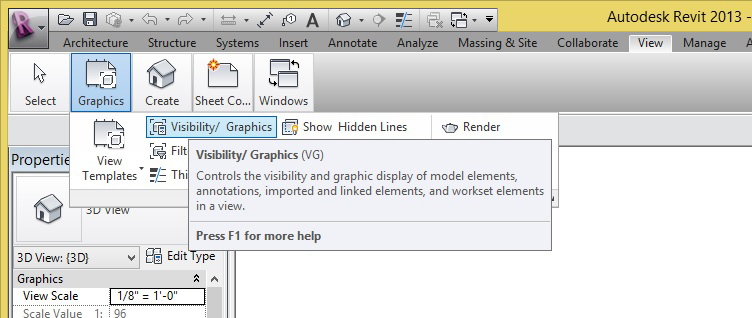
→ Go to the View Tab in Revit → Click on Visibility/Graphics OR type in “VG”
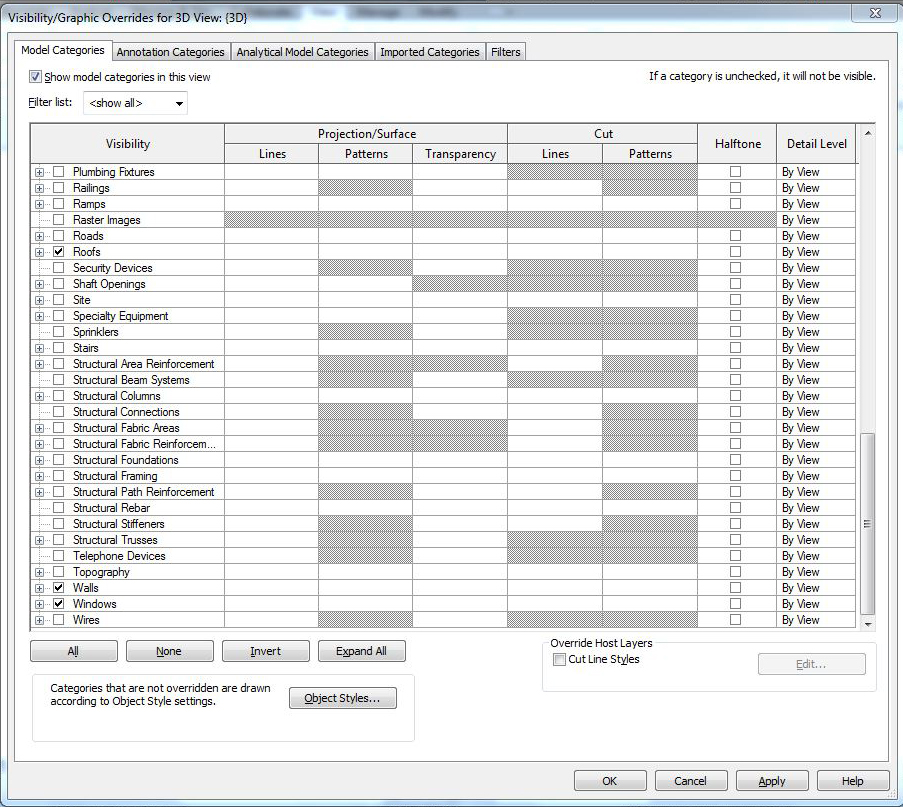
All you need from your Revit model are the floors and the exterior envelope, including glazing. Uncheck all model categories EXCEPT the following: Curtain Panels, Curtain Systems, Curtain Wall Mullions, Doors, Floors, Roofs, Walls, and Windows.
2. Export to DWG / DXF
Please note that .dwg /.dxf import is only possible with Pro versions of Sketchup, which requires a license. If you do not have SketchUp Pro, Sefaira support can assist you with bringing your .dwg file into SketchUp.
[contact support@sefaira.com]
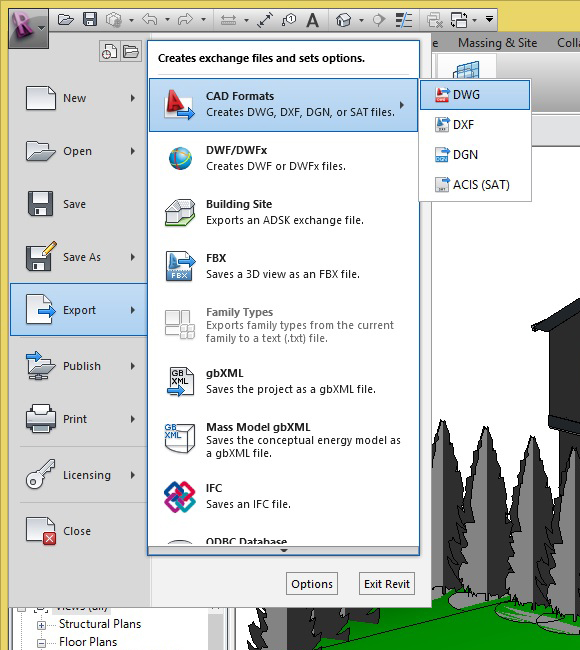
→ Click the Revit “R” → Export → CAD Formats → DWG or DXF
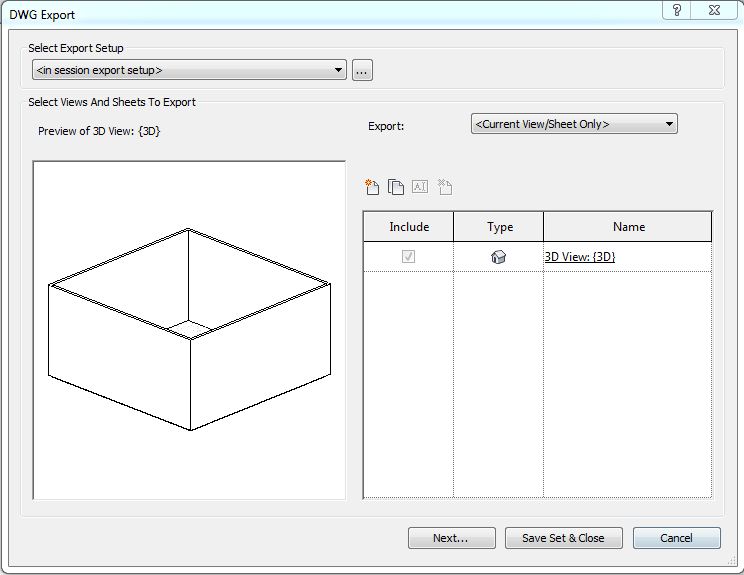
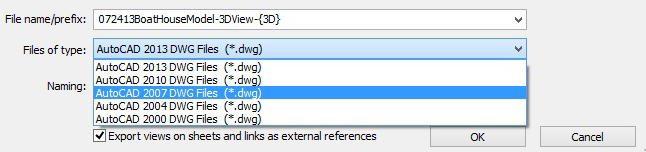
When this dialog box appears, leave the default settings and click Next.
If you are using the latest version of SketchUp Pro (2013), downsave to ‘AutoCAD 2010 DWG File’.
If you are using SketchUp 8 Pro, or an earlier version, downsave to ‘AutoCAD 2007 DWG File’.
3. Import your DWG or DXF File to SketchUp
→ [In SketchUp] File → Import
4. Consolidate Imported Model
The SketchUp model maintains Revit’s layers, and is grouped based on Revit’s component definitions. In order to create a model for Concept, you generally do not need this information. Take the following steps to clean up your workflow in SketchUp:
In SketchUp’s layers dialog box, make sure all layers are visible and that your current layer is ‘Layer0’.
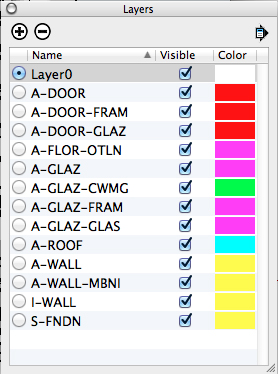
Select all layers EXCEPT ‘Layer 0’, and then click the delete button.
Before clicking delete, select either 'Move to Current layer’ OR ‘Move to Default layer’

5. Create a Web App-Ready SketchUp Model
Using your imported Revit model as a baseline, create a conceptual representation of your design. Your Web App-ready model should be dimensionally accurate, and include the building’s envelope with representative glazing quantities, floor plates, and contextual massings. If you are testing specific shading devices, they should be modeled in SketchUp as well. Otherwise, you can add and test multiple variations of shading devices for optimized energy savings within the Web App.
Note: There is no need to model wall thicknesses, interior walls, or details such as entourage, furniture, fixtures, etc. The goal is to keep it simple.
Comments